
Related Stories

Verifying your GCash opens up a lot of benefits in using your GCash app, such as:
- Access all GCash features and services
- Increased wallet and transaction limits
- Secures you and the people you transact with
Access all GCash features and services
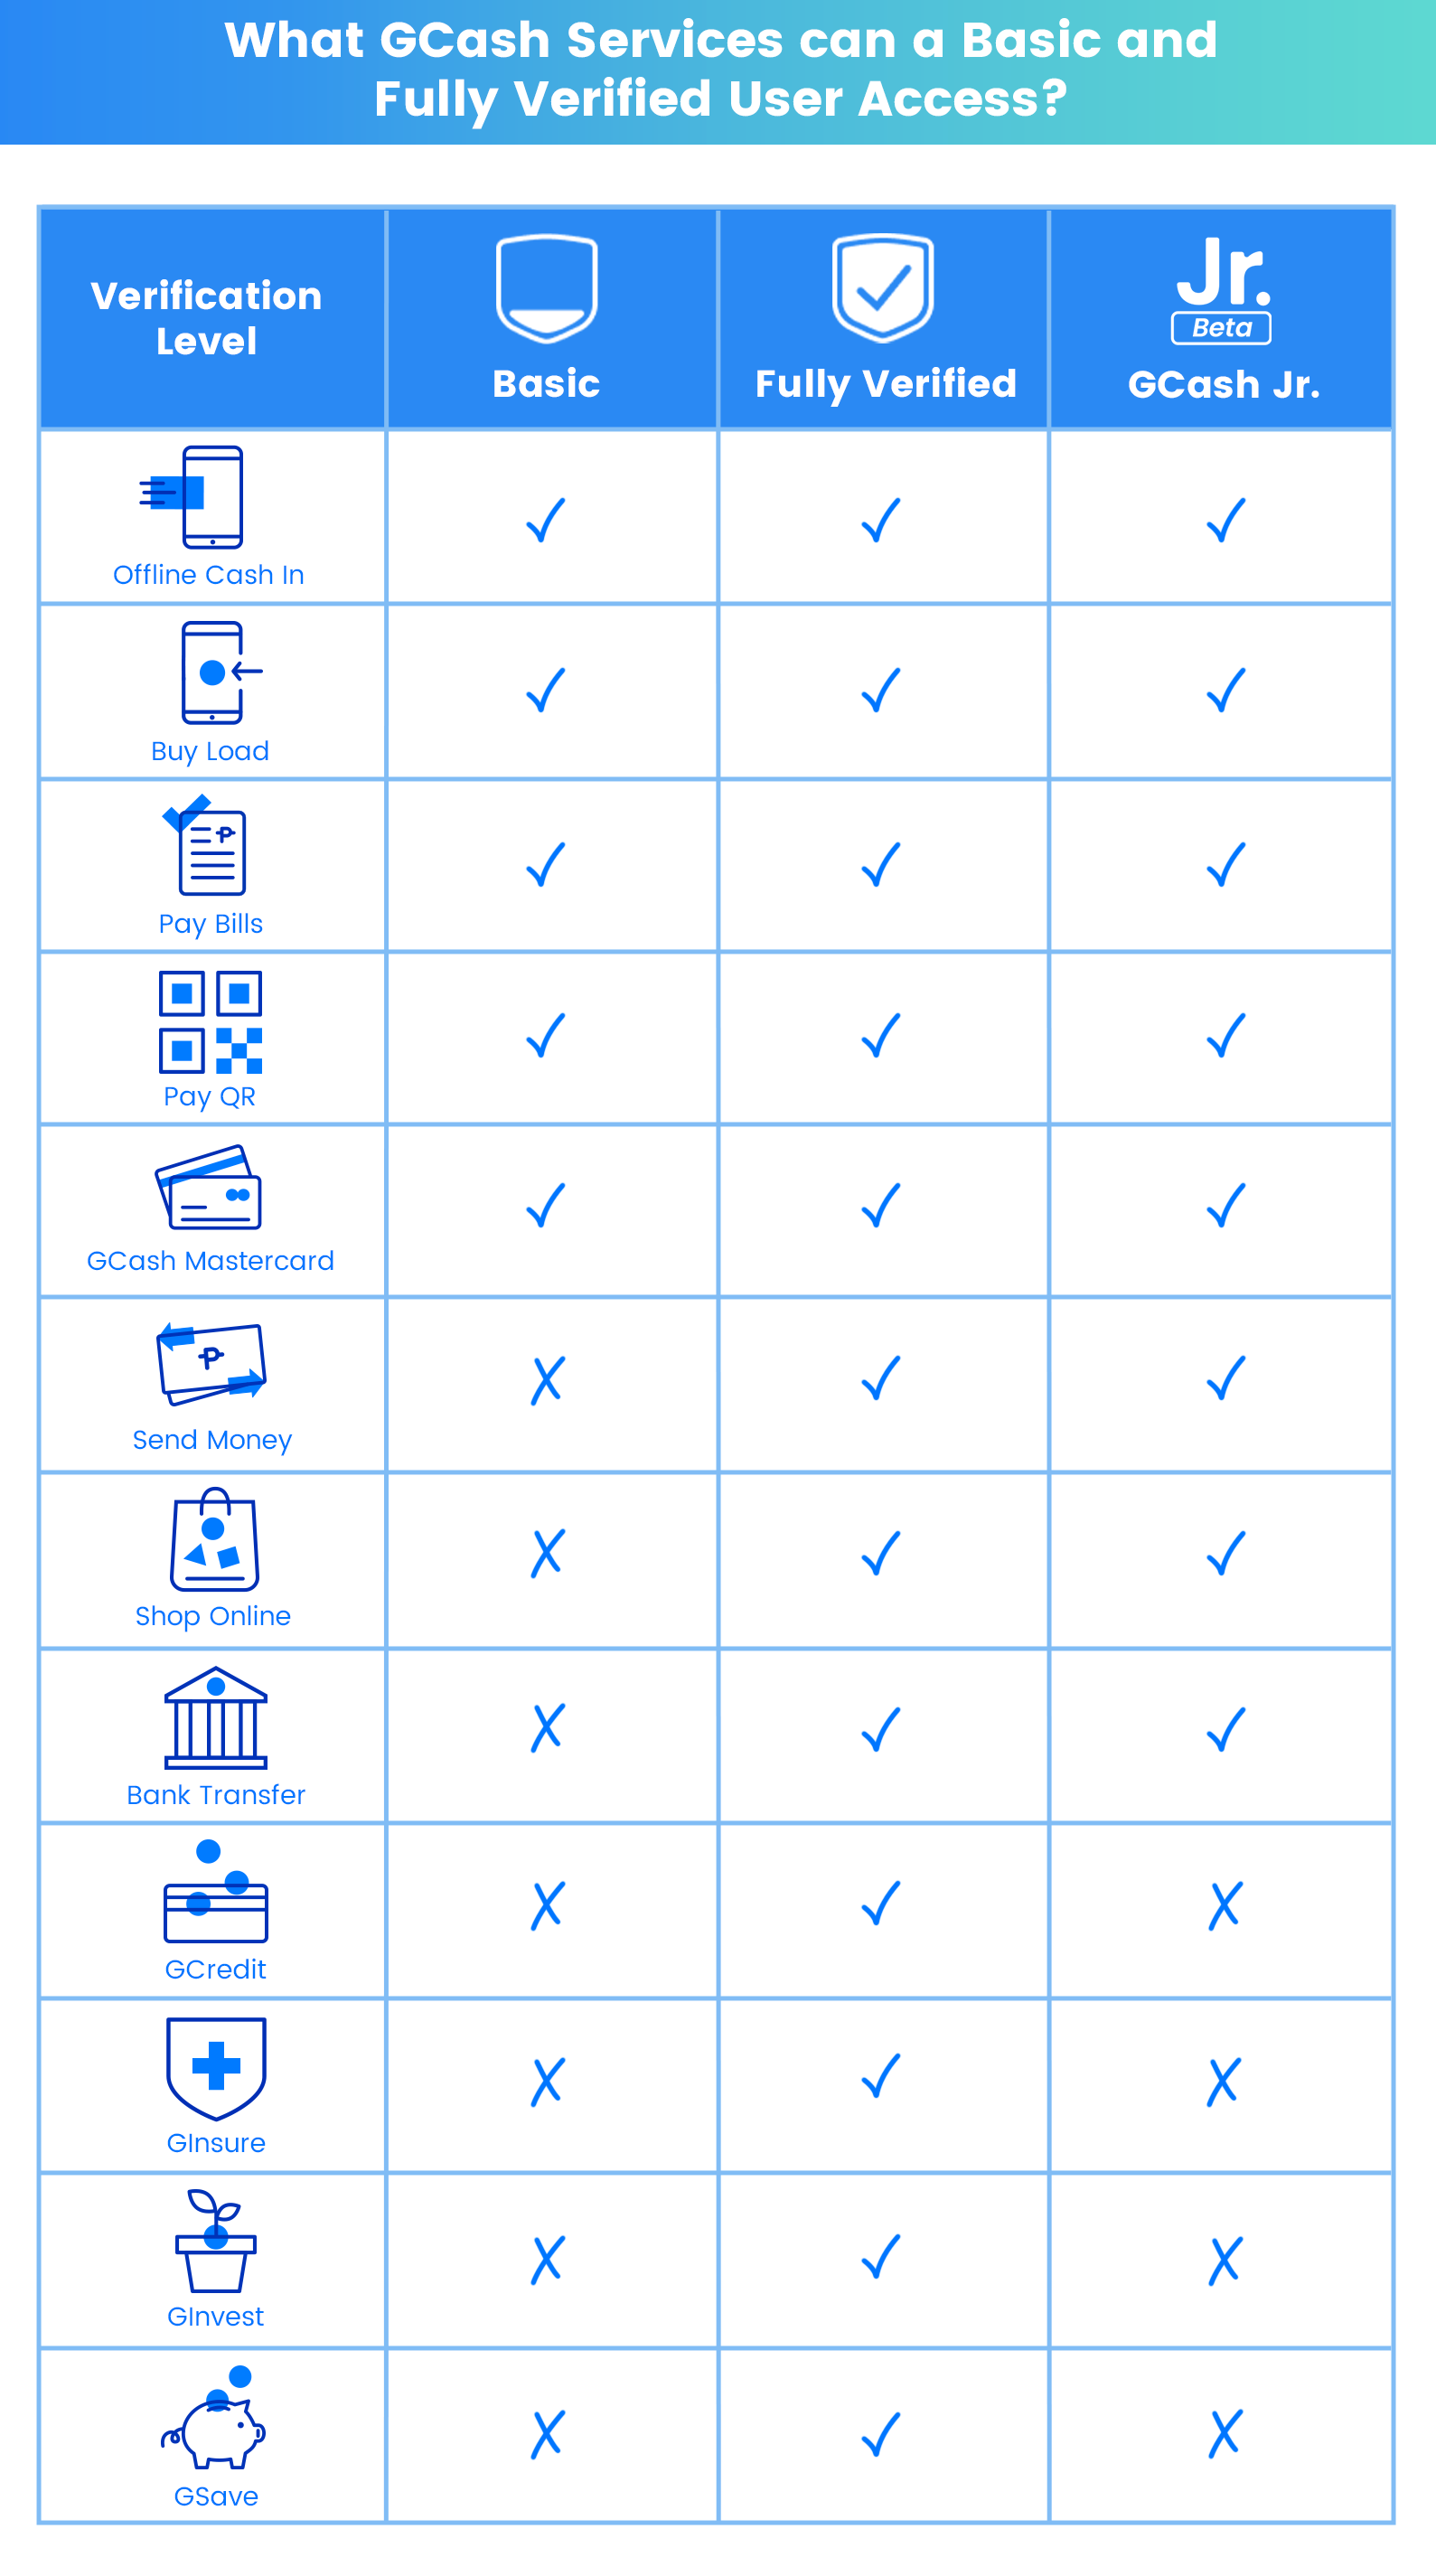
Here are the additional GCash features and services you can enjoy when you fully verify your account:
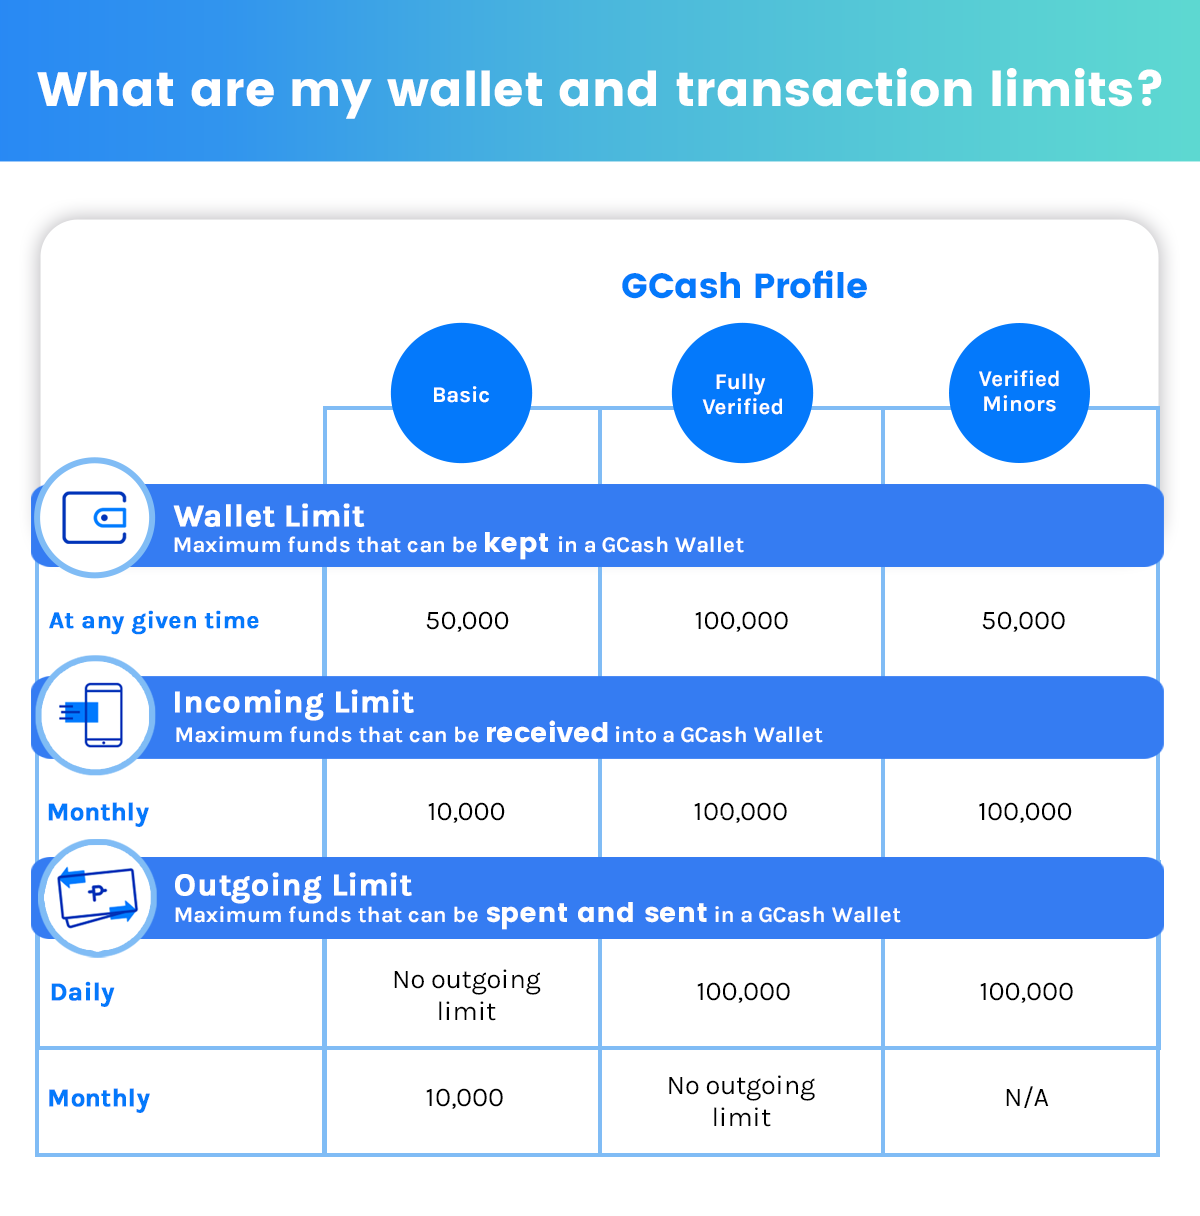
Increased wallet and transaction limits
When you undergo full verification, your wallet limit increases to P100,000, which means you will be able to keep up to P100,000 in your GCash wallet at any given time.
Secures you and the people you transact with
Transacting with fully verified users is more secure because:
- GCash has a copy of valid documents proving the legitimacy of the user’s identity
- Users provide personal information to support proof of their identity
- Users take a selfie scan which proves that they are human and not a bot
Follow these tips to fully verify your GCash Account
TIP: To fully verify your GCash account:
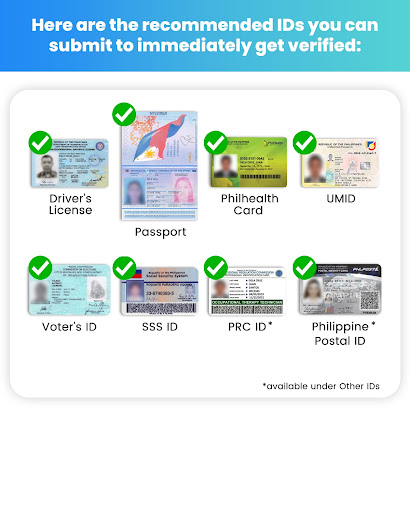
- Prepare a valid (not expired) government ID that you have on hand
- Here are some tips on how to choose the right ID for your application:
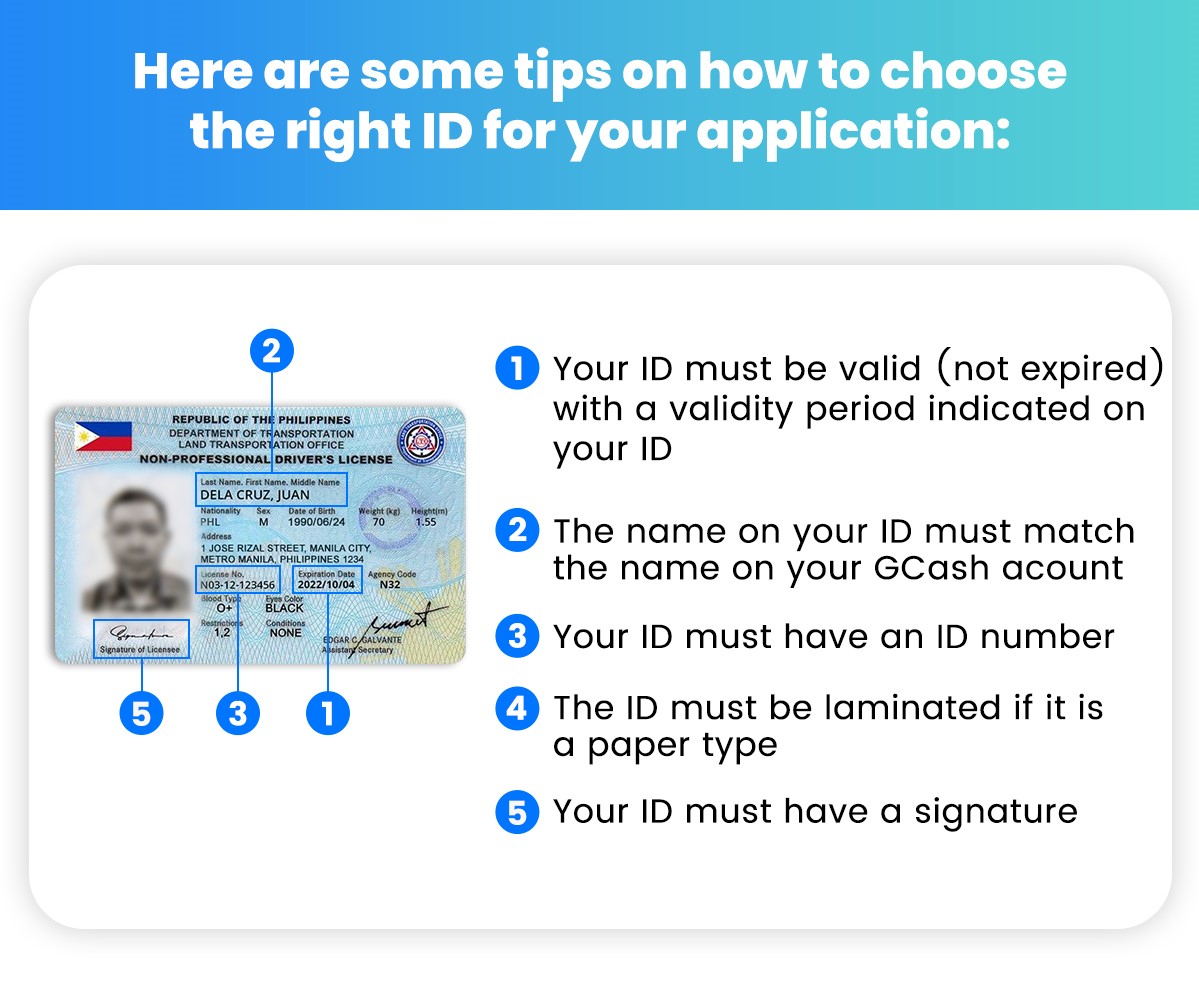
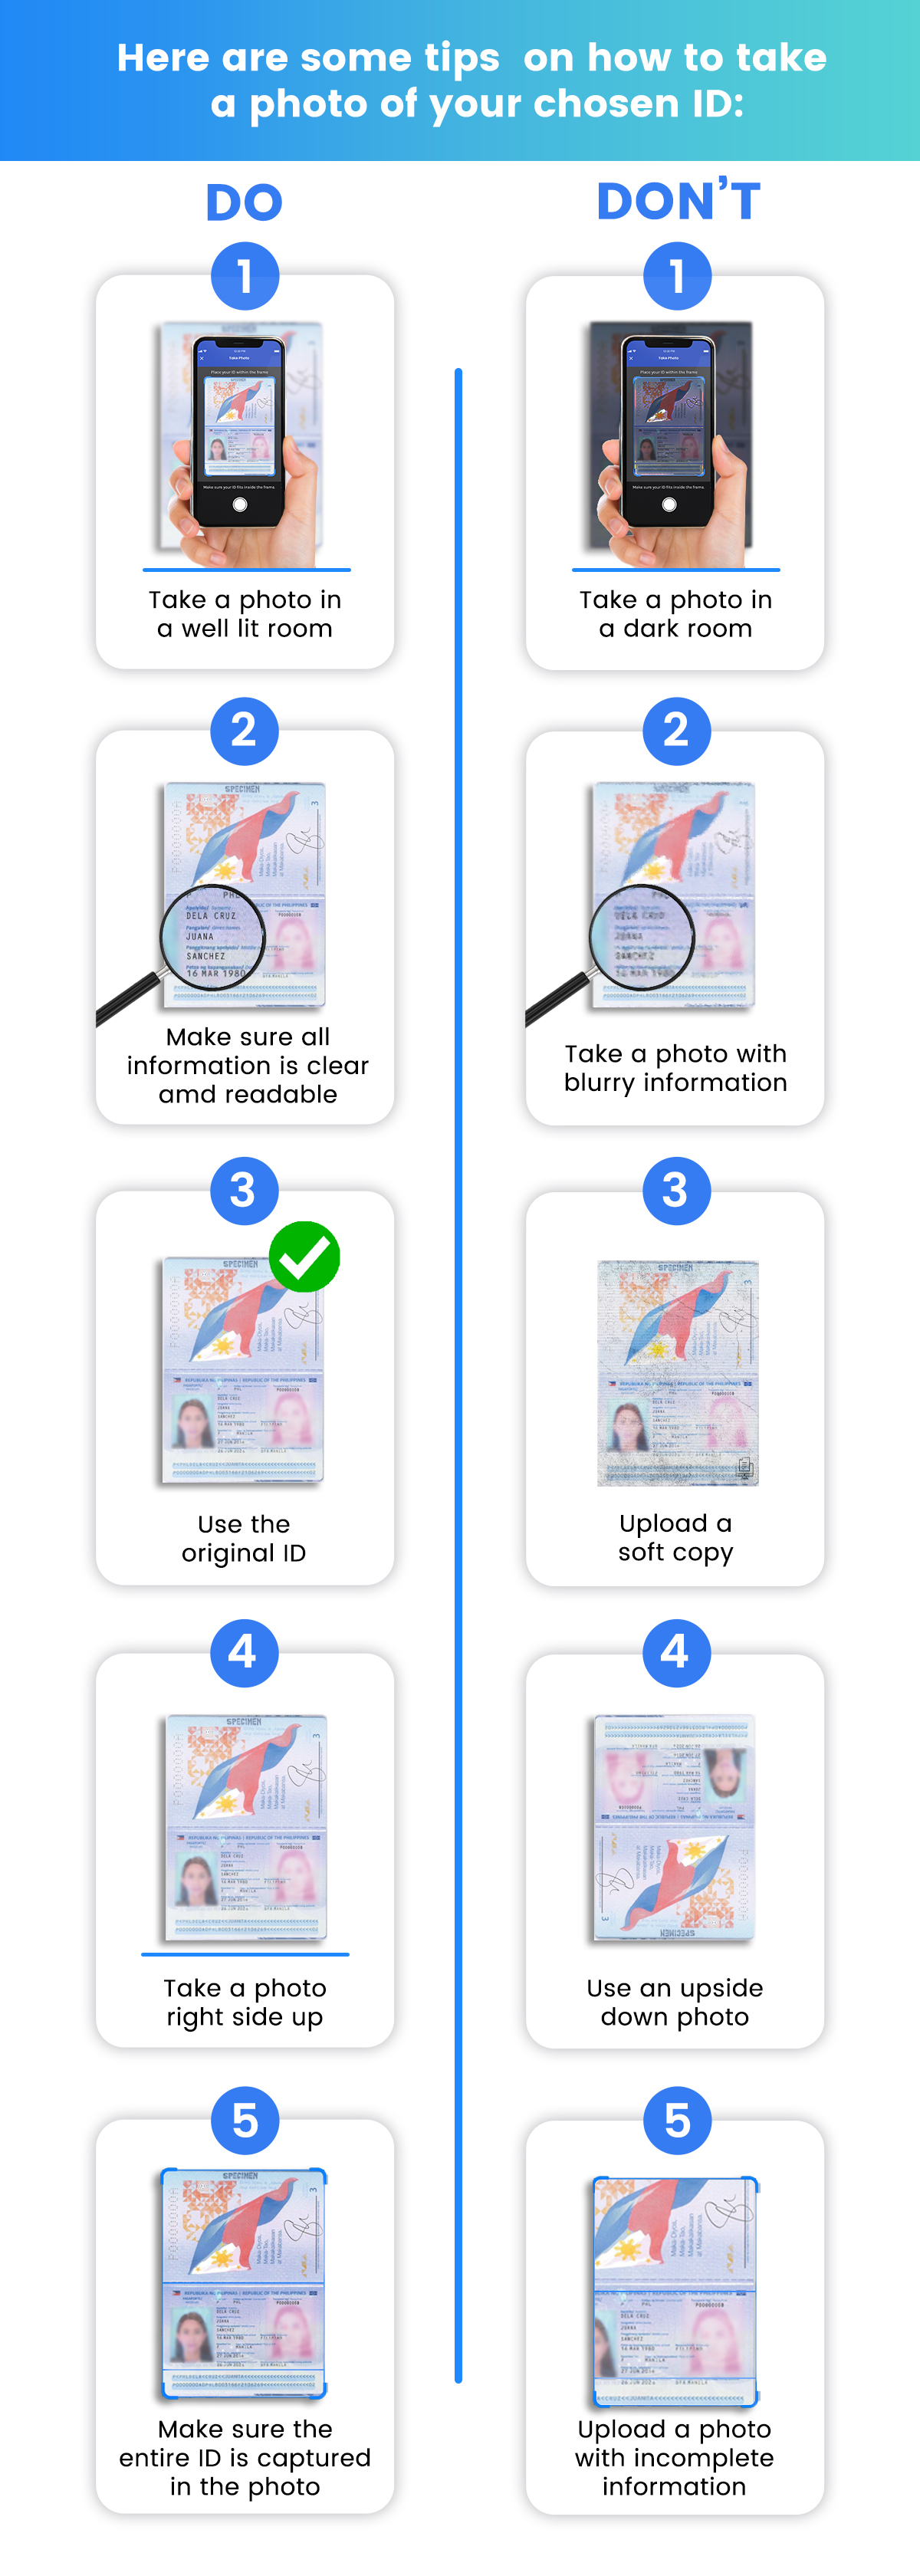
- Make sure the photo of your chosen ID comes out clear and complete
- Prepare to take a selfie
Follow these steps to fully verify your GCash account:
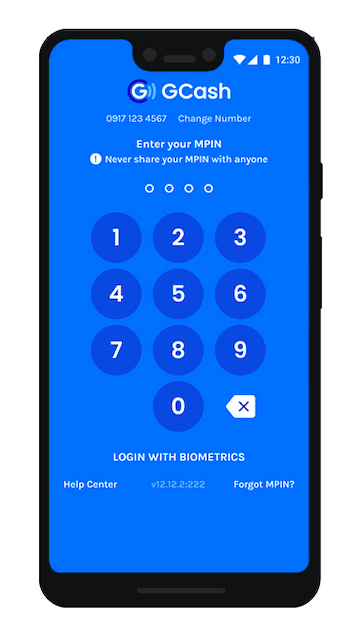
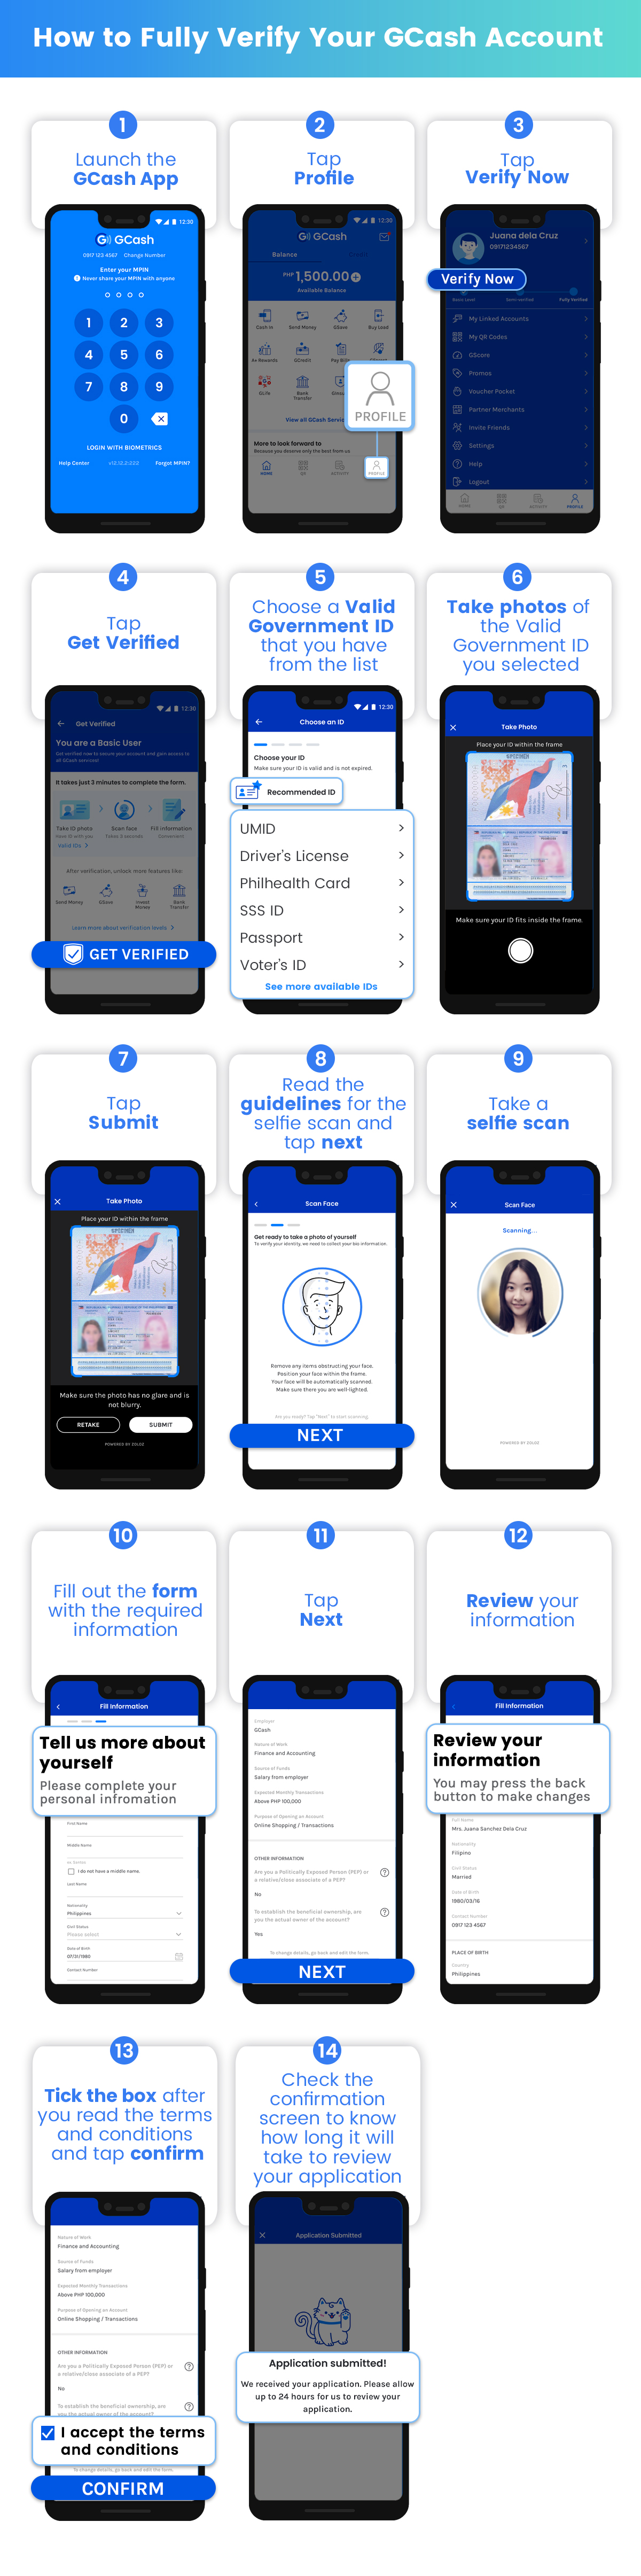
STEP 1: Launch the GCash App
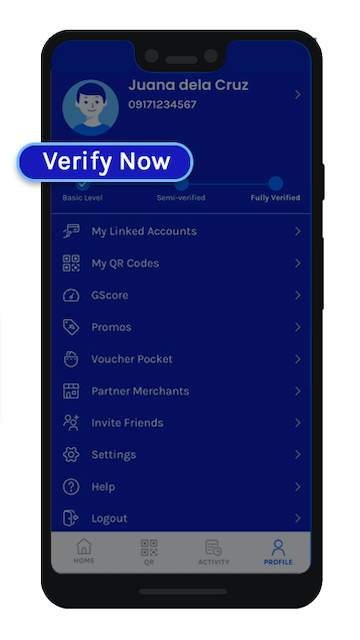
STEP 2: Tap the Profile icon on the bottom right of the screen
![]()
STEP 3: Tap Verify Now below your name
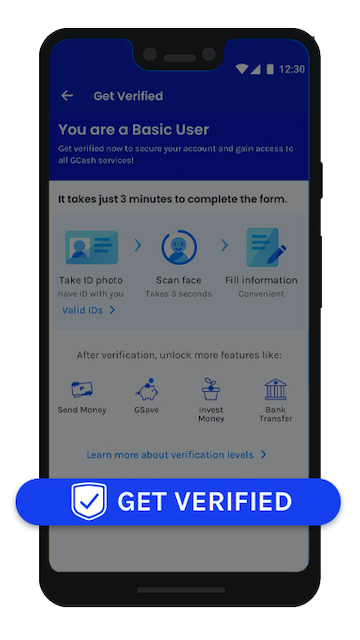
STEP 4: Tap Get Verified
STEP 5: Choose from the list a valid (not expired) government ID that you have on hand
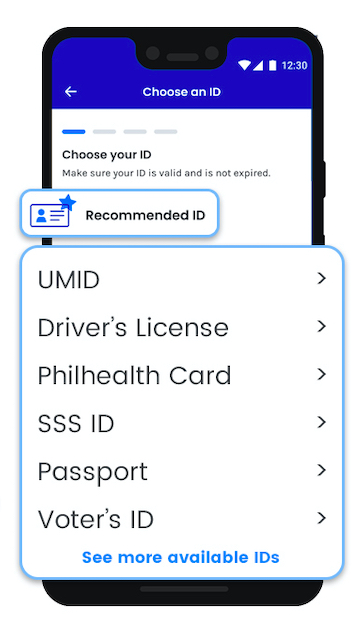
- Make sure to choose the correct ID type, if the photo of the ID you choose to take photos of doesn't match the ID type selected in this step, your application will be rejected.
- The following IDs will not be accepted
- Barangay ID
- TIN ID
- School ID
- Company ID
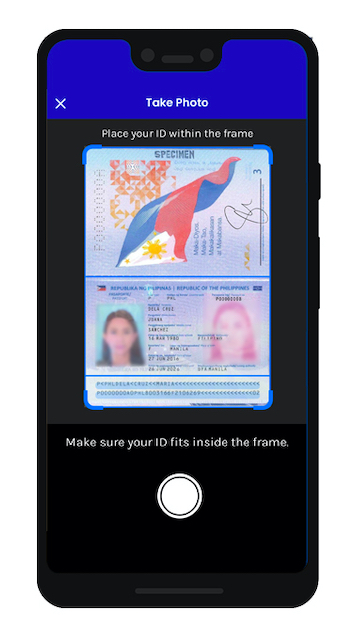
STEP 6: Take photos of the valid government ID that you chose
Make sure the information is clear and readable.
If you submit your Alien Certificate of Registration (ACR), you will need to take a picture of the front and back of your ID.
Not satisfied with the photo of your ID? Tap Retake to get a better quality photo.
STEP 7: Tap Submit

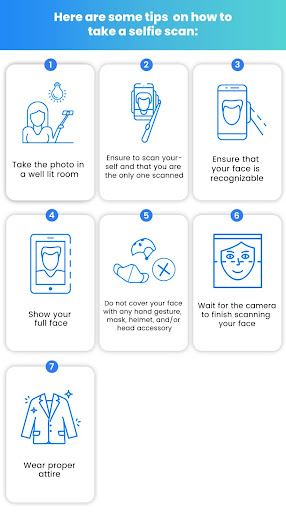
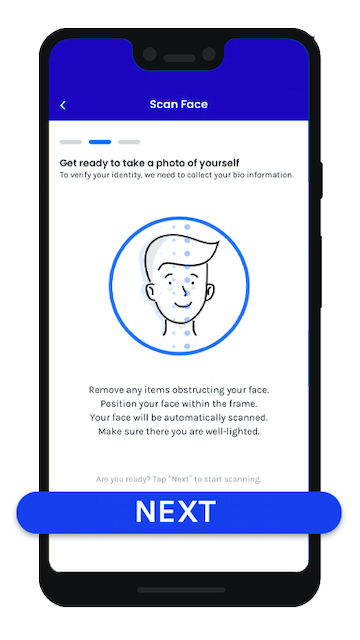
STEP 8: Read the guidelines on how to properly take a photo of yourself, then tap Next
To verify your identity, you will need to take a photo of yourself through a selfie scan.
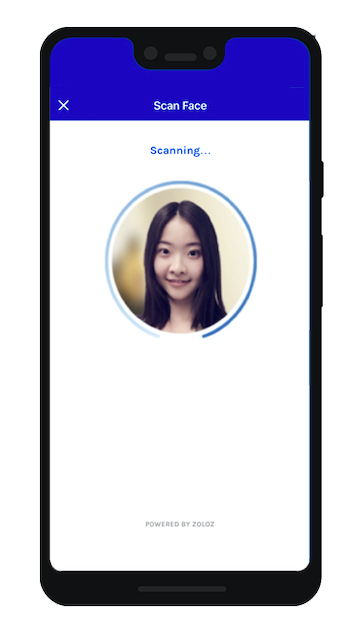
STEP 9: Take a selfie scan
Position your face within the frame, then wait for the camera to scan your face. Blink when instructed.
Make sure your photo comes out clear.
Not satisfied with your photo? Tap Retake to get a better quality photo.
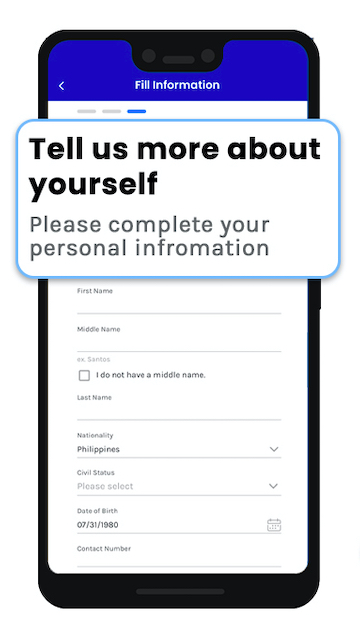
STEP 10: Fill up the form with the required information
Fill up the form with correct information to avoid being rejected due to inconsistent details.
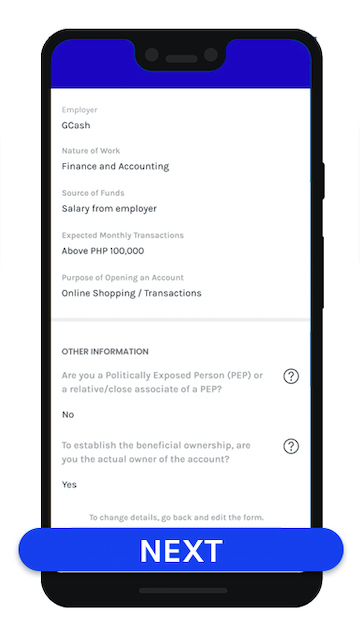
STEP 11: Tap Next
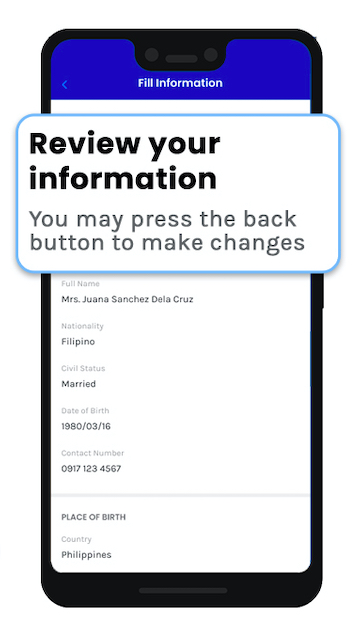
STEP 12: Review your information
Ensure that the details provided are correct and accurate such as your ID Type, ID Number, name, birthdate, and address to avoid rejection.
To change details, you can go back and edit the form by tapping the arrow in the upper left corner.
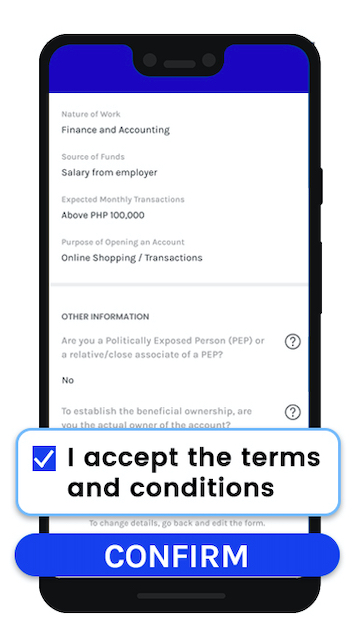
STEP 13: Read the Terms and Conditions and tick the box to state that you agree to the Terms and Conditions. Tap Confirm to submit your application.
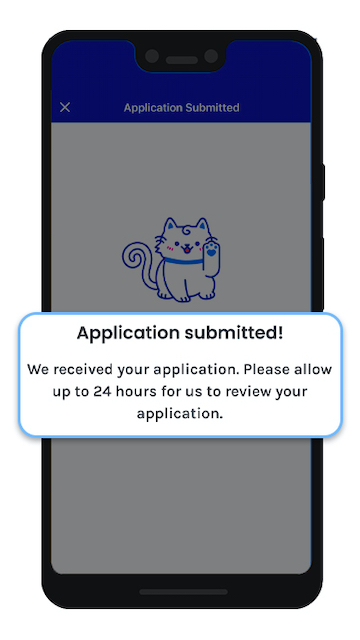
You will see a confirmation screen that your application has been submitted. Check the confirmation screen to know how long it will take for us to review your application.
Here’s a summary on how to fully verify your GCash account:
Post a Comment
Hey... say something!